Zooming text animation banner effect
In this tutorial, we will learn how to create an attention grabbing zoomed text animation effect. A very effective and smooth looking animation technique in photoshop. For the purpose of this tutorial, the design aspect of this banner will remain clean and plain. Our main focus here is the animation.
Here is what we will be creating:

This tutorial will also cover the basic design aspect of a banner ad, so if you want skip this part, you can go directly to the animation part
We will create a very popular size, 300x250 square banner ad. To get started, click on FILE » NEW and enter width: 300 pixels, height: 250 pixels, Resolution: 72 pixels/inch
One of the first rule of creating a banner ad is we need to create a 1px border around the whole banner. This will give the banner a defined space, and the images displayed inside will be confined within the border rather than abruptly end at the edges.
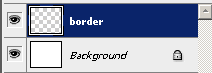
To create the 1px border, first create a new layer by selecting in the top menu "Layer » New » Layer" - name this layer 'border' and click OK.
Now press "CTRL + A" on your keyboard, this will make a selection around your entire banner.
Then go to "Edit » Stroke" - in the stroke dialog, set the following: "Width:1px - Color: black, Location: Inside, Mode: Normal, Opacity: 100%". Click OK, then press "CTRL+D" to deselect the selection.

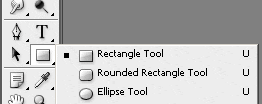
To give our banner a nice background, lets add a nice gradient to the background. Select the shape tool "Rectangle Tool"
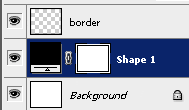
Use this tool to draw a shape large enough to cover your whole banner. Slightly larger is fine as long as the full banner area is filled by this shape. Make sure this new shape layer is placed underneath the border layer we created above. if not, the drag it down.
Now, with the shape layer selected, go to "Layer » Layer Style » Gradient Overlay" - in the gradient color box, set the following colors (or any color you want):

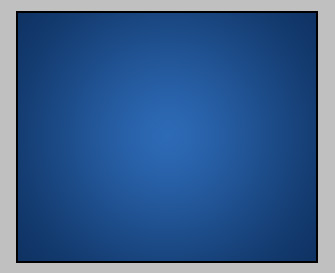
You should end up with a background like this:
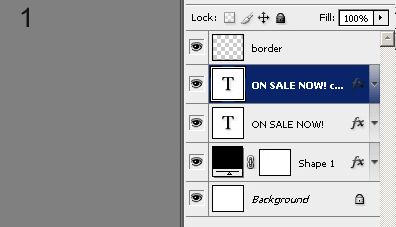
Now lets add some texts for animation. Use the text tool ![]() to write your text.
to write your text.

This part is optional, because how you want your text to look is entirely up to you, but I prefer to add a little style and color to my texts, so with the text layer selected, click on "Layer » Layer Style » Gradient Overlay"
Add the following

On the left where the Blendin g Options are, click the "Inner Shadow" and apply the following:

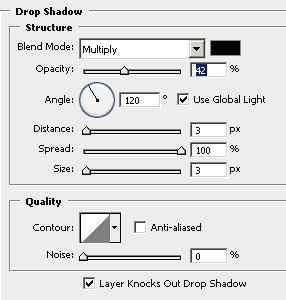
Click on the Drop Shadow option and apply the following:
and lastly, this Stroke style

If you followed the above, you should have something like this: (you may apply your own styles for your own look and feel).

Now comes the FUN part. Animation.
First, we need to duplicate the text layer. So select the text layer, right click and select DUPLICATE LAYER

Then create a new layer " Layer » New » Layer " - then hold down CTRL + click on the new layer you just selected, and the DUPLICATE text layer, and press "CTRL+E" - this will merge the new layer, and duplicated text layer together, creating a new rasterized layer of the text with the applied styles (see the animation below) . The reason we have to do this instead of just 'rasterize' the text layer is if you just 'rasterize' the layer, the layer styles will scale along with the layer when you resize it, giving it an unwanted styles effect on the layer.
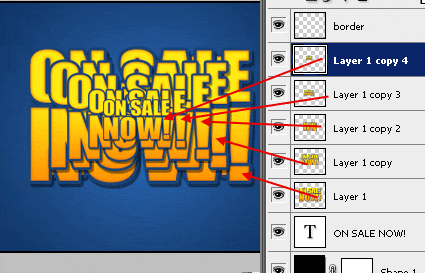
Now Duplicate this new merged layer 4 times. ( as above, right click on the layer, and select "Duplicate Layer", do this 4 times)
You should now be left with 5 copies of that rasterized layer.
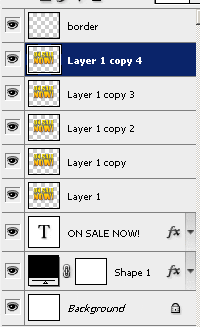
Now, for each of the new duplicated layer, we will resize them.
So going according to the layers pallete above, select the layer named "Layer 1", then press "CTRL+T" to activate the transform tool. then while holding down the SHIFT key, drag the anchor point outwards to enlarge this layer, so that it's slightly larger than the original. Press Enter to apply this change.

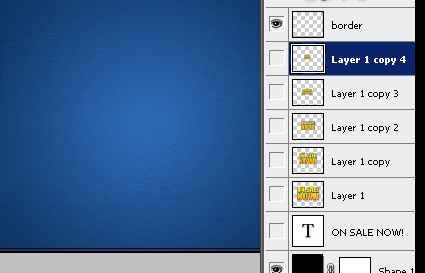
Now, lets hide all the above layers so it's easier for us to see what we're working with.
for "Layer 1 copy" - do the same as above, BUT this time maker it slightly smaller than the original.
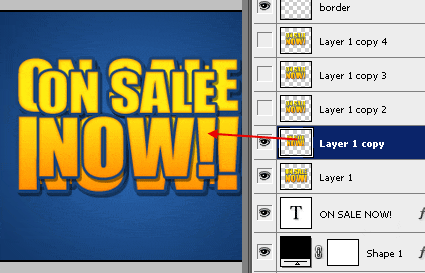
Now, repeat for all above layers "Layer 1 Copy 2, Layer 1 copy 3 and Layer 1 Copy 4", for each layer, resize it so it's smaller than the previous layer, like so:
Ok, now lets animate it. first, lets HIDE all the text layers, leaving only the background. To hide the layers, click on the "eye" icon.
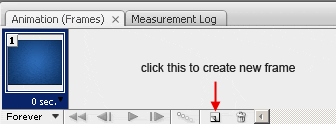
If your animation pallete is not visible, click on WINDOW » and check the "Animation" option. In your animation pallete, there is a button you will need to click to create a new frame, as shown below, so remember this button when I say "create new frame"
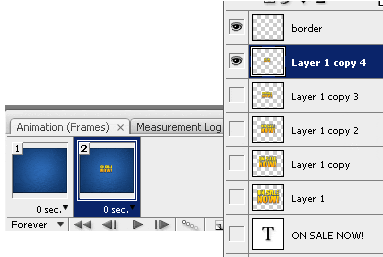
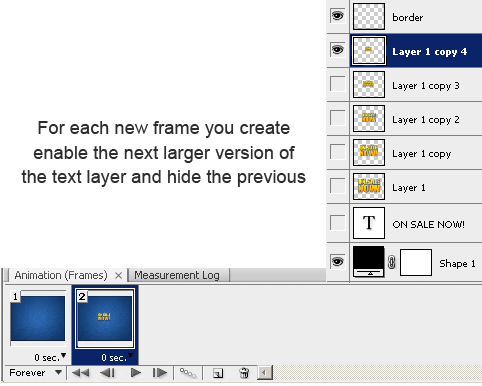
With all your text layers hidden, your first frame in the animation should be like the above. just blank. Now, click on the 'create new frame' button to create a new frame. Everytime you create a new frame, you will be working directly on that frame only, so whatever movements you make will affect that frame only. With this new frame created, set your "Layer 1 copy 4" layer (which is the smallest text) to visible by enabling the 'eye' icon.
Next, create another new frame, this time, HIDE the "Layer 1 copy 4" layer, and enable "Layer 1 copy 3"....
Then, create a new frame, and HIDE "Layer 1 copy 3" and enable "Layer 1 copy 2"....
Then, create a new frame and HIDE "Layer 1 copy 2" and enable "Layer 1 copy"....
Then, create a new frame and HIDE "Layer 1 copy" .. and enable "Layer 1"...
and lastly, HIDE "layer 1" and enable the original text layer.
Now you should have a total of 7 frames, and if you click the PLAY button on the animation pallete, you will see the following:
It's too fast I'ld say, unless thats the look you want (flashing and annoying), I would set some timing. Underneath each frame, it current says "0 sec" - click on this to set the timing for each frame. Here is my settings.

And here is the result: