This section of the site will tech you some photoshop techniques used by our designers.
How to Create a Shiny Button
The shiny button is widely used in web 2.0 style websites. The following tutorial will show, how to create a Shiny Button using gradients, selection tools, and basic transform operations. Let's have some fun with this.
Step 1
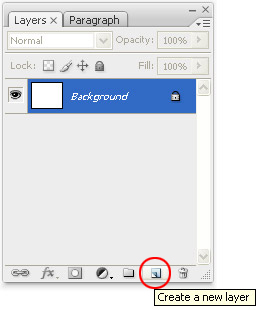
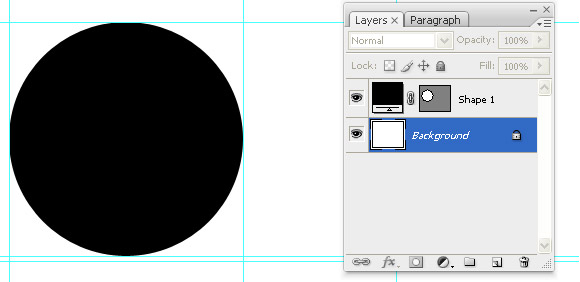
Lets start the tutorial by creating a new layer as shown in Image A.
Creating new layer (Layer A)
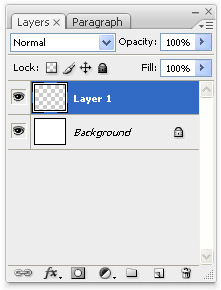
It's look like the above image (Layer B)
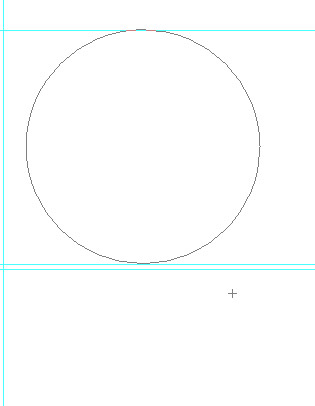
Create a circle using eclipse tool from toolbar. Hold down shift key and drag the
eclipse tool till desired size is achieved.
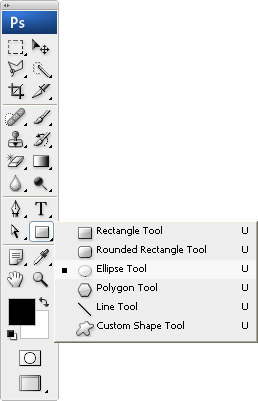
Select the Ellipse Tool
Drawing circle
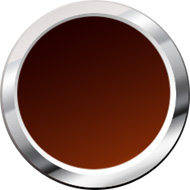
It's look like the above image
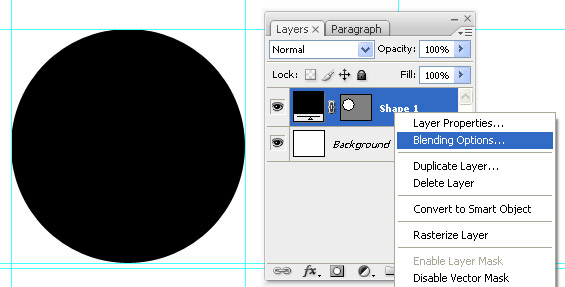
Step 2
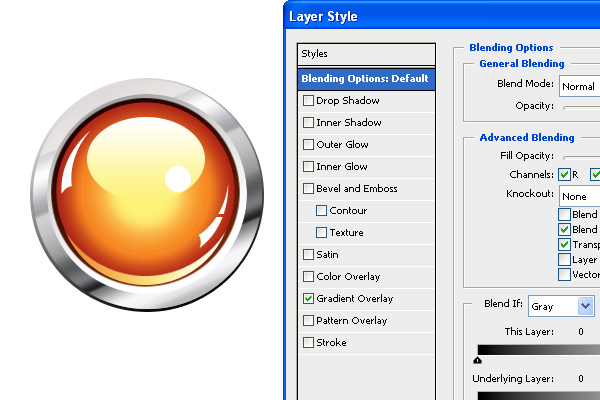
Right click on the layer & select "Blending options".
Blending options
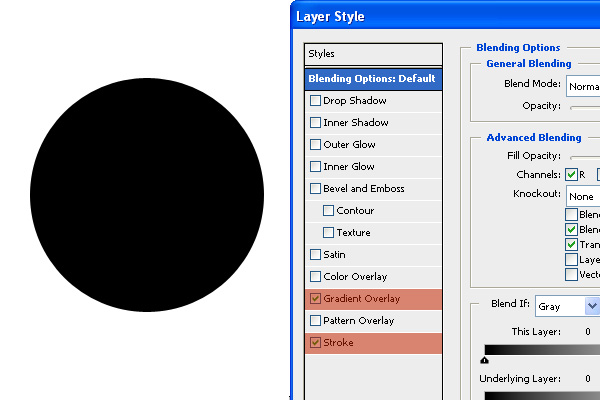
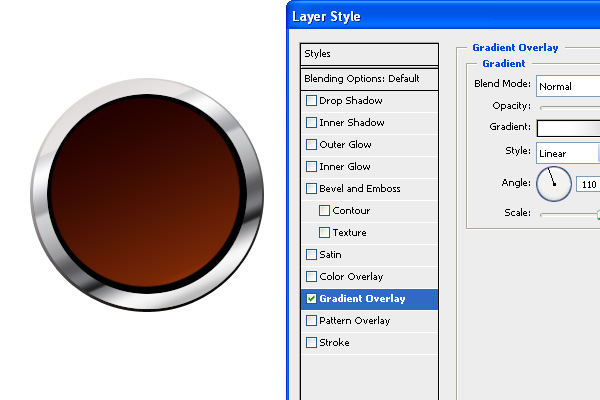
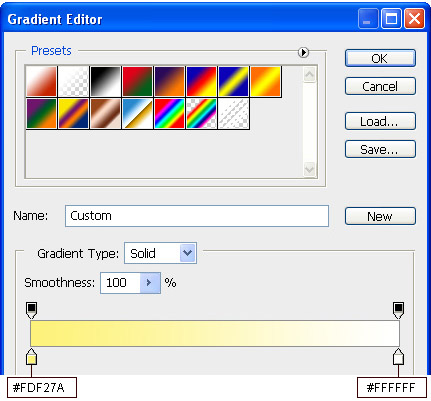
Apply Gradient overlay as shown in IMAGE A.
IMAGE A
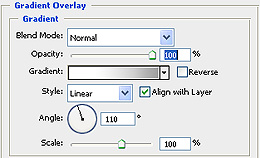
IMAGE B :Apply stroke a as shown in IMAGE B, use gradient for stroke.
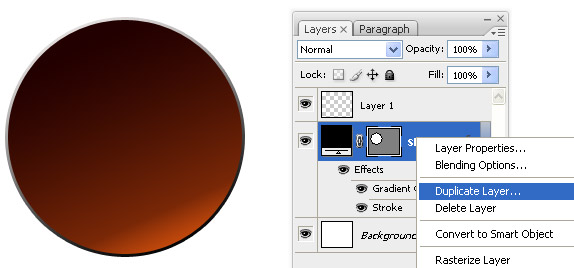
Step 3
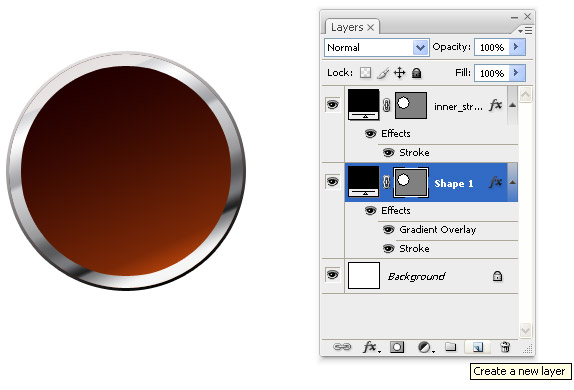
Now duplicate the above Layer (Layer B) and choose "Clear layer style" by using right click option on the current Layer.
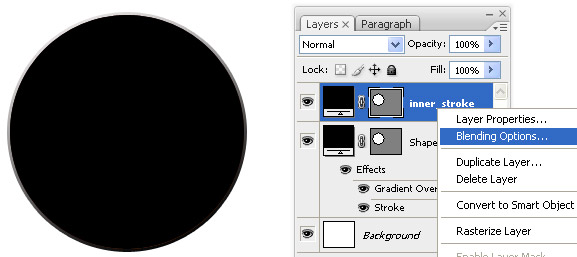
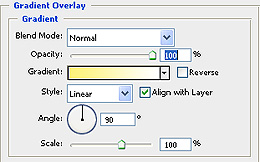
To apply Gradient effect to the ring, right click on the layer & choose blending options.
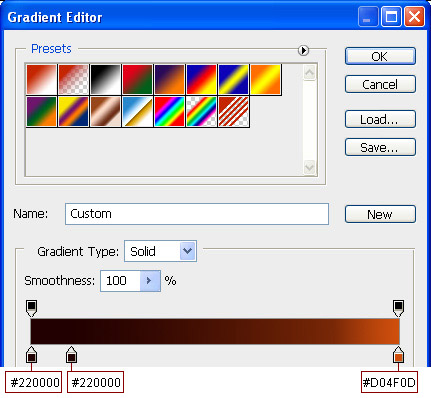
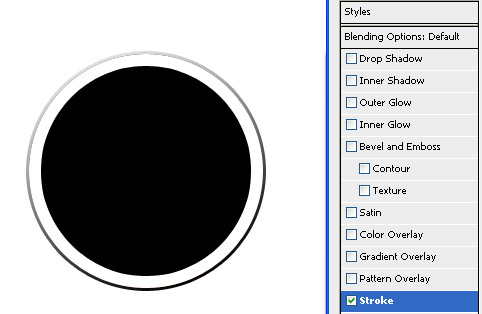
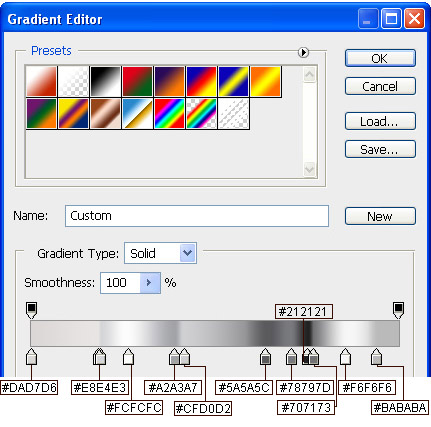
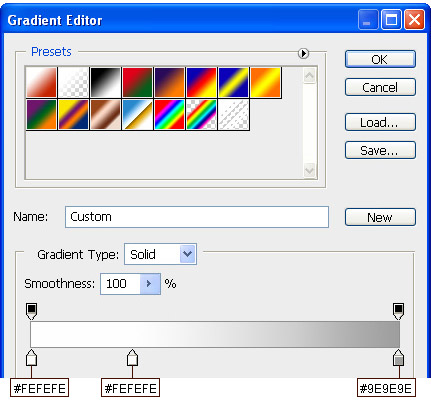
In blending options select Stroke > Fill type: Gradient. For gradients choosed colour codes as shown below.
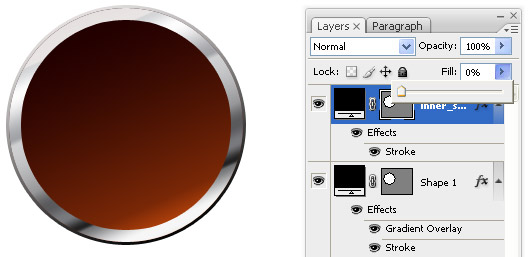
After applying the gradient, Set the Fill option at top to 0%.
Step 4
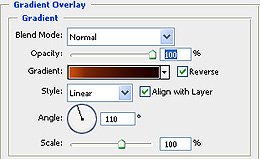
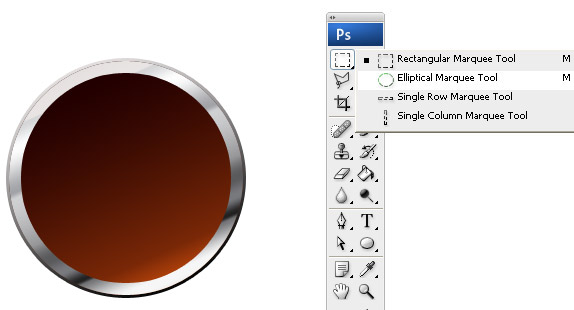
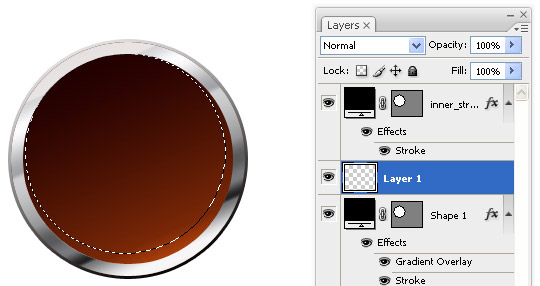
To obtain an inner shadow effect, create one more ring by using Marque tool as shown below
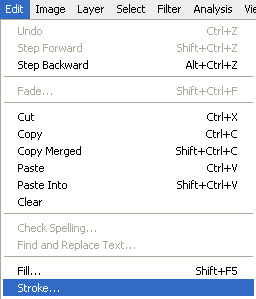
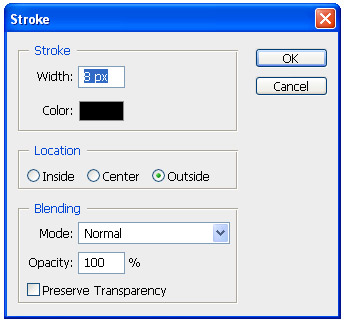
Create new layer and draw a circle using marquee tool . Apply the stroke of 8px "Inside" using Edit > Stroke.
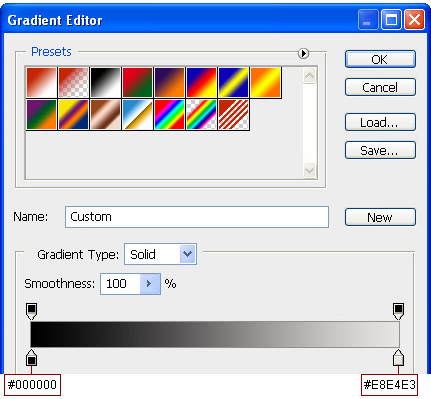
Apply a Gradient effect from Gray to white. Keep the angle to 110 degrees shown below.
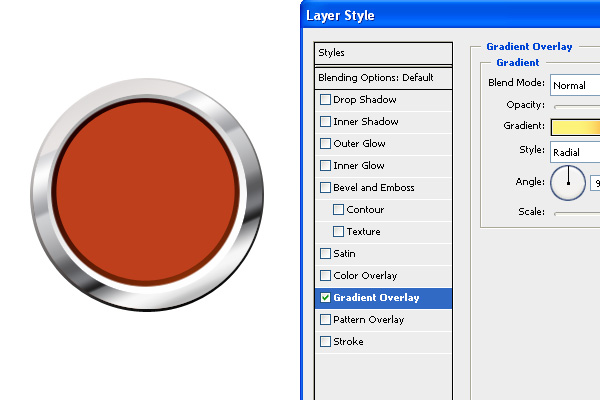
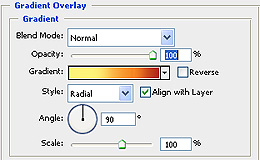
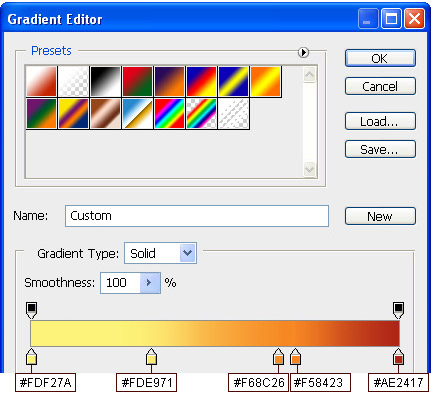
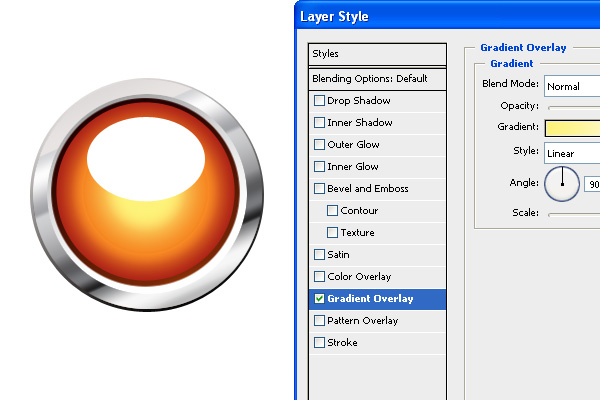
Step 5
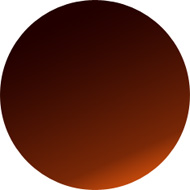
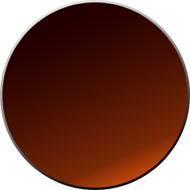
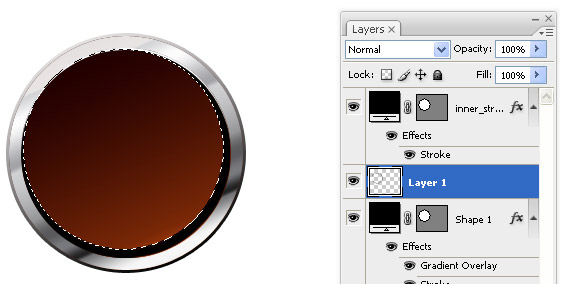
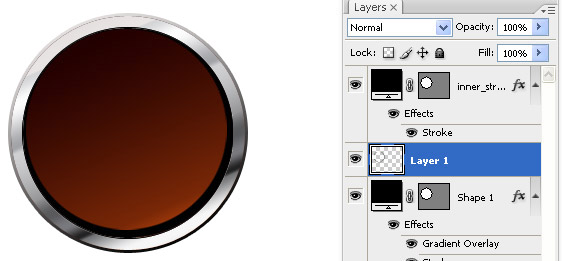
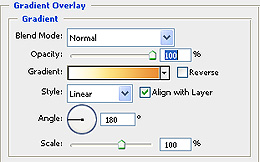
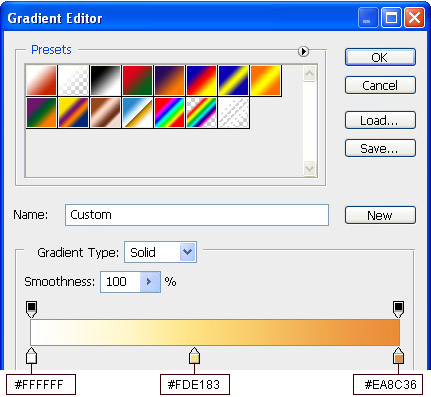
Now create a new circle in the center of main circle and apply gradient overlay effects for this as shown below.
Apply a multicoloured gradient effect as shown below,
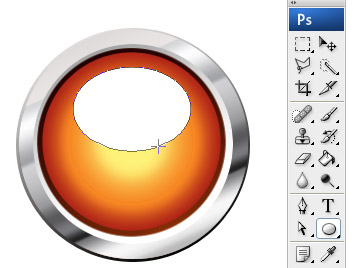
Step 6
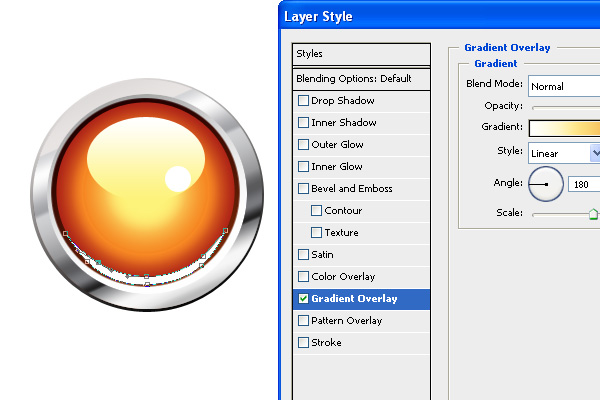
To get a shining effect create a oval shape at the top of inner circle and apply� gradient effects as shown below. To give finishing touches to the shining effect just create a small circle at the bottom right of oval shape as shown in Image C
IMAGE C
Step 7
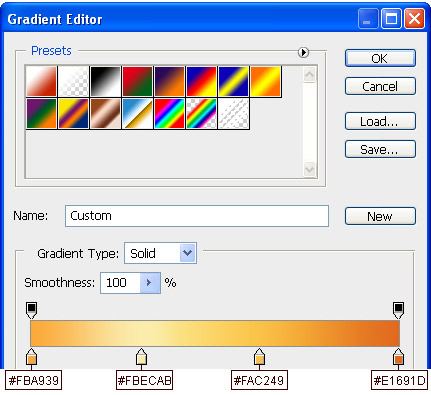
Now create a curved shape using pen tool at the bottom as shown below & apply gradient overlay effect to get the nice look as shown below.
Step 8
Next step is to create a 3D glossy look by creating few shapes at the right and left of inside circle using pen tool. Use Pen tool to create it as shown below. Apply gradient overlay style.
Step 9
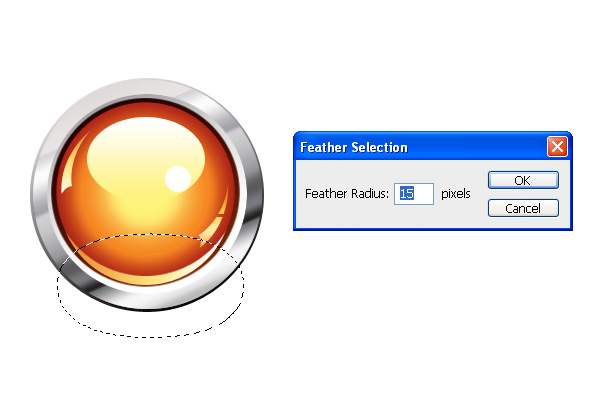
To make the button more realistic, give shadow effect by creating a new layer at the lower bottom For this choose Select >> Modify >> Feathers from the menu bar. Give the Feather radius value as shown below.
Set the Grey Color (#b8b8b8) at the foreground.
Here we come to the end of this tutorial. The same effect can also be re-created using different colors.